 BuildSheet
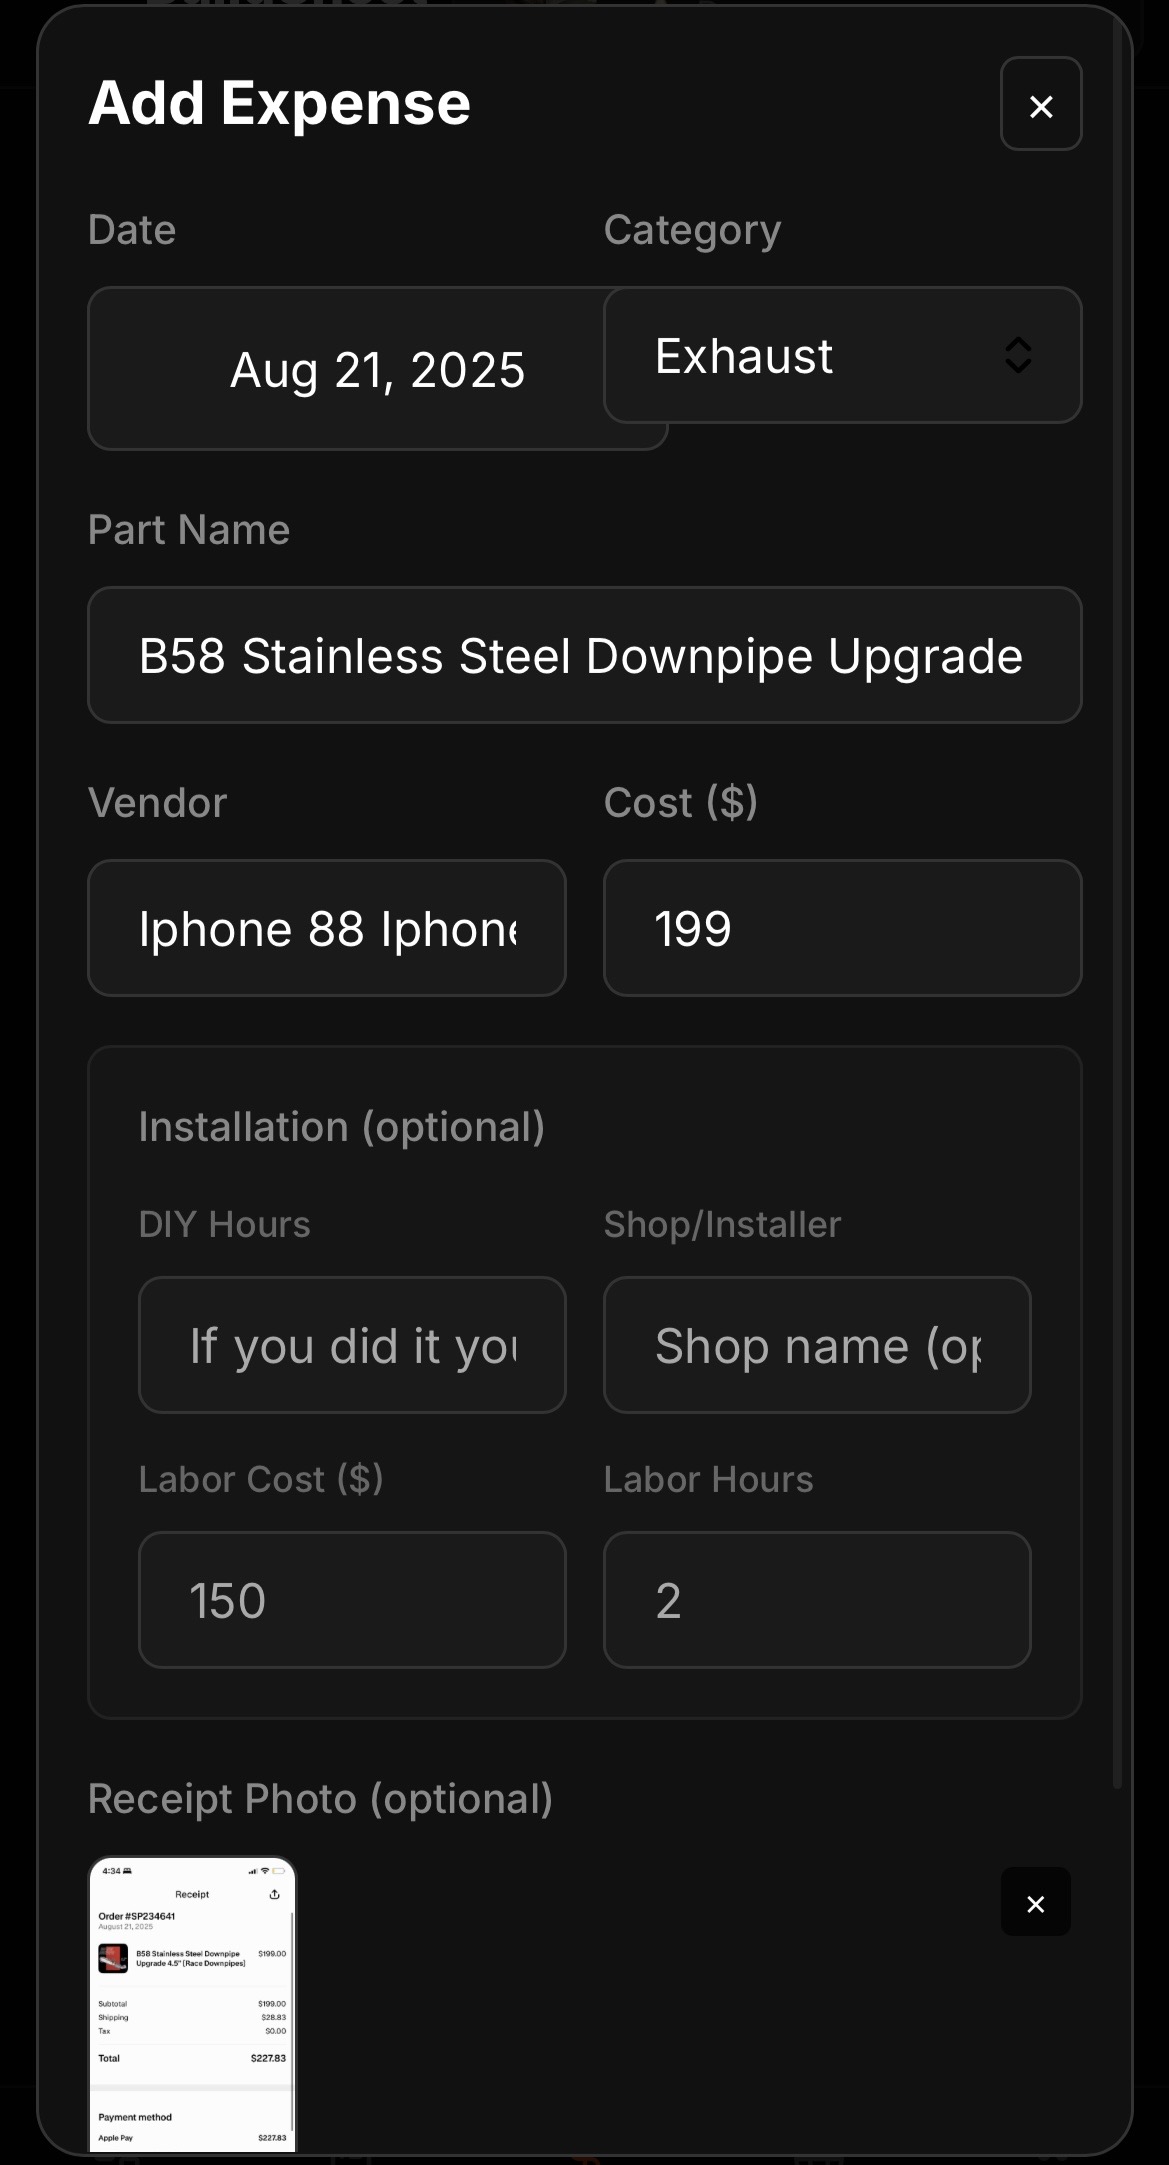
Step by step
- Open the expenses tab and choose Scan Receipt.
- Take a clear, well-lit photo of the receipt, or pick one from your photo library.
- Wait a moment while BuildSheet reads the receipt and extracts the item, amount, and vendor.
- Review the pre-filled expense, correct anything the scan missed, and pick a category.
- Save to add it to your build. The total updates right away.
Free vs Pro
The free plan includes one AI receipt scan for the lifetime of the account so you can try it. Pro unlocks unlimited scanning, which is where it pays off during a heavy build with lots of receipts.
Getting the best scan
- Flatten the receipt and avoid glare and shadows.
- Include the full receipt in frame, especially the total line.
- Faded thermal receipts scan better in bright, even light.